
Homemade Brioche Bread: the very words conjure images of golden-brown crusts, a soft, buttery crumb, and the irresistible aroma filling your kitchen. Have you ever dreamed of creating a loaf of bread so exquisite, so decadent, that it rivals the finest patisseries? Well, dream no more! This recipe will guide you through the surprisingly simple process of baking your own brioche masterpiece.
Brioche, with its rich history rooted in French baking traditions, has long been a symbol of indulgence and celebration. Legend has it that Marie Antoinette, when told the peasants had no bread, famously quipped, “Let them eat cake!” While the accuracy of the quote is debated, it perfectly encapsulates the association of brioche with luxury and abundance. This bread, enriched with butter and eggs, stands apart from your everyday loaf.
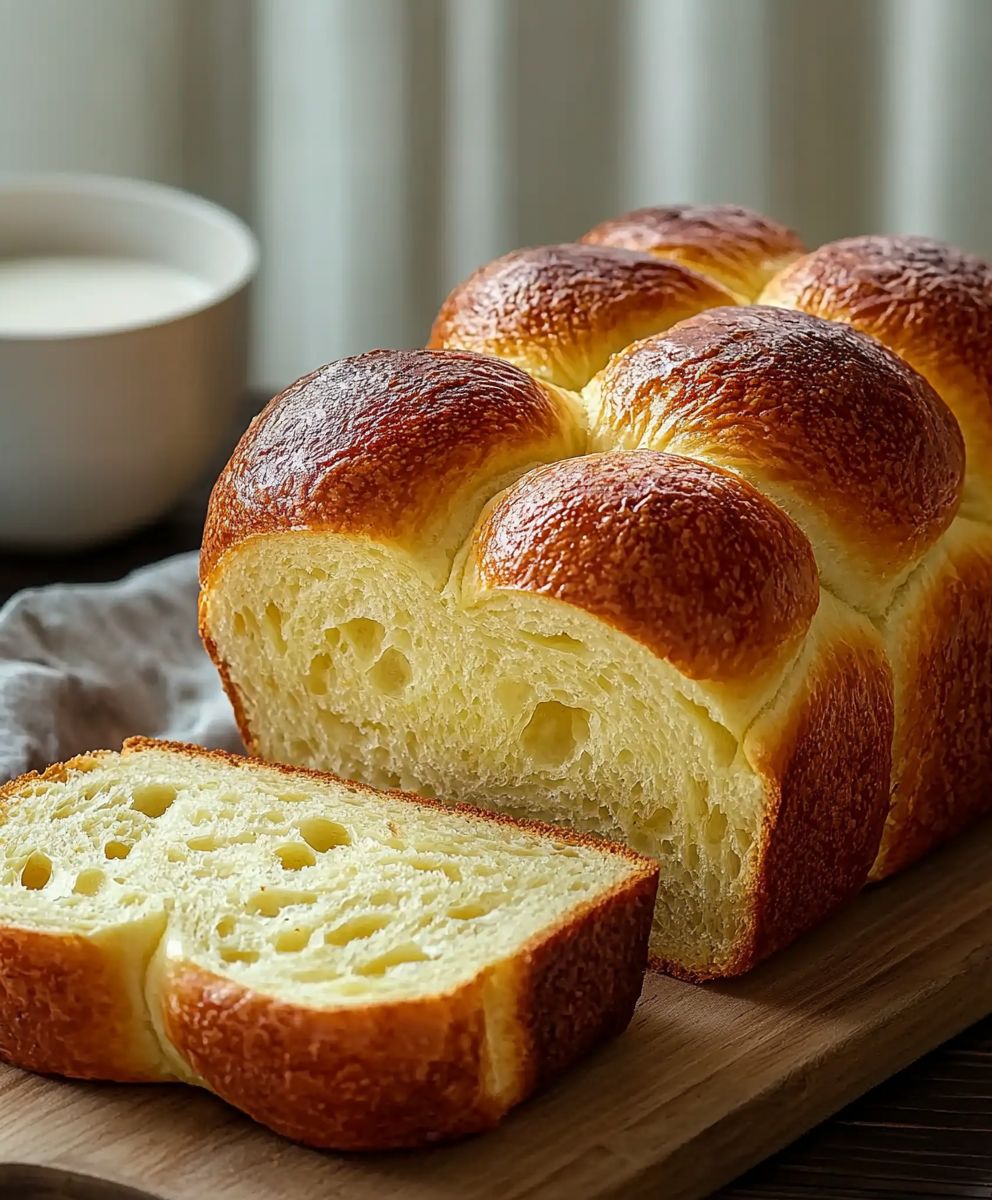
But what is it about homemade brioche bread that makes it so universally loved? It’s the perfect balance of textures a delicate, slightly crisp exterior giving way to an incredibly soft, almost melt-in-your-mouth interior. The buttery flavor is undeniably addictive, making it ideal for everything from gourmet sandwiches and decadent French toast to simply enjoying a warm slice with a smear of your favorite jam. Plus, the satisfaction of baking your own bread from scratch is simply unparalleled. So, let’s embark on this baking adventure together, and you’ll soon be enjoying the unparalleled delight of freshly baked brioche!

Ingredients:
- For the Starter (Poolish):
- 1 cup (125g) all-purpose flour
- 1 cup (240ml) lukewarm water
- 1/4 teaspoon instant dry yeast
- For the Dough:
- 4 cups (500g) all-purpose flour, plus more for dusting
- 1/2 cup (100g) granulated sugar
- 1 1/2 teaspoons salt
- 2 teaspoons instant dry yeast
- 1/2 cup (120ml) lukewarm milk
- 4 large eggs, lightly beaten
- 1 cup (226g) unsalted butter, softened but still cool, cut into 1-tablespoon pieces
- For the Egg Wash:
- 1 large egg
- 1 tablespoon milk or cream
Preparing the Starter (Poolish)
Okay, let’s get started with the poolish! This is a pre-ferment that will give our brioche a wonderful depth of flavor and a light, airy texture. Don’t skip this step it’s worth it!
- Combine the ingredients: In a medium bowl, whisk together the 1 cup of all-purpose flour, 1 cup of lukewarm water, and 1/4 teaspoon of instant dry yeast until smooth. Make sure there are no lumps of flour remaining.
- Let it rest: Cover the bowl tightly with plastic wrap and let it rest at room temperature for at least 2 hours, or preferably overnight (8-12 hours). You’ll know it’s ready when it’s bubbly and has nearly doubled in size. It should have a slightly tangy aroma. If you let it rest overnight, the poolish may deflate slightly, which is perfectly fine.
Making the Brioche Dough
Now for the main event the brioche dough! This is where the real magic happens. Be patient and follow the steps carefully, and you’ll be rewarded with the most delicious homemade brioche.
- Combine dry ingredients: In the bowl of a stand mixer fitted with the dough hook attachment, combine the 4 cups of all-purpose flour, 1/2 cup of granulated sugar, 1 1/2 teaspoons of salt, and 2 teaspoons of instant dry yeast. Whisk them together to ensure everything is evenly distributed. This helps the yeast activate properly and the salt to not inhibit the yeast.
- Add wet ingredients: Add the lukewarm milk, lightly beaten eggs, and the prepared poolish to the dry ingredients. Mix on low speed until the dough comes together. It will be shaggy and sticky at this point, and that’s perfectly normal.
- Incorporate the butter: This is the key to a rich and tender brioche. With the mixer still on low speed, add the softened butter, one tablespoon at a time, allowing each piece to be fully incorporated into the dough before adding the next. This process will take some time, about 10-15 minutes. Don’t rush it! The dough will gradually become smoother and more elastic.
- Knead the dough: Once all the butter has been added, increase the mixer speed to medium-low and knead the dough for 8-10 minutes. The dough should be smooth, elastic, and slightly tacky. It will still be a bit sticky, but it should pull away from the sides of the bowl. If the dough is too sticky, add a tablespoon of flour at a time until it reaches the desired consistency. Be careful not to add too much flour, as this will make the brioche tough.
- First rise: Lightly grease a large bowl with oil or cooking spray. Transfer the dough to the bowl, turning to coat. Cover the bowl tightly with plastic wrap and let it rise in a warm place for 1-1.5 hours, or until doubled in size. You can also let it rise in the refrigerator for a longer, slower rise (8-12 hours), which will develop even more flavor.
- Punch down the dough: Gently punch down the dough to release the air. Turn the dough out onto a lightly floured surface.
- Shape the dough: Now, you can shape the dough into whatever form you like! Here are a few options:
- Loaf: Divide the dough into three equal pieces. Roll each piece into a long rope. Braid the ropes together and place the braid in a greased 9×5 inch loaf pan.
- Dinner Rolls: Divide the dough into 12-16 equal pieces. Roll each piece into a ball and place them in a greased baking dish, leaving a little space between each roll.
- Brioche Buns: Divide the dough into equal pieces depending on the size of buns you want. Shape each piece into a ball. Use your thumb to make a deep indentation in the center of each ball. Place the buns on a baking sheet lined with parchment paper.
- Second rise: Cover the shaped dough loosely with plastic wrap and let it rise in a warm place for another 45-60 minutes, or until almost doubled in size. This is a crucial step for achieving a light and airy brioche.
Baking the Brioche
Almost there! Now it’s time to bake our beautiful brioche. The aroma that will fill your kitchen is simply divine.
- Preheat the oven: Preheat your oven to 350°F (175°C). Make sure your oven rack is in the center position.
- Prepare the egg wash: In a small bowl, whisk together the egg and milk or cream. This will give the brioche a beautiful golden-brown color and a shiny crust.
- Brush with egg wash: Gently brush the top of the risen brioche with the egg wash. Be careful not to deflate the dough. You can apply a second coat of egg wash for an even deeper color.
- Bake: Bake the brioche for 30-35 minutes, or until golden brown and the internal temperature reaches 190-200°F (88-93°C). If the top of the brioche is browning too quickly, you can tent it with aluminum foil during the last 10-15 minutes of baking.
- Cool: Remove the brioche from the oven and let it cool in the pan for 10 minutes before transferring it to a wire rack to cool completely. This will prevent the bottom from becoming soggy.
Serving and Storing
Congratulations! You’ve made homemade brioche bread. Now it’s time to enjoy the fruits of your labor.
Serve the brioche warm or at room temperature. It’s delicious on its own, or you can use it to make sandwiches, toast, or French toast. It’s also perfect for making bread pudding or other desserts.
Store leftover brioche in an airtight container at room temperature for up to 3 days, or in the freezer for up to 2 months. To freeze, wrap the brioche tightly in plastic wrap and then in aluminum foil. Thaw overnight in the refrigerator before serving.
Enjoy your delicious homemade brioche!
Conclusion:
And there you have it! This Homemade Brioche Bread recipe isn’t just another bread recipe; it’s an experience. From the rich, buttery aroma that fills your kitchen to the soft, golden crumb that melts in your mouth, every step of this process is a testament to the joy of baking. I truly believe that once you’ve tasted homemade brioche, you’ll never want to go back to store-bought again.
Why is this a must-try? Because it’s incredibly versatile! Beyond the sheer pleasure of eating it plain, warm from the oven, this brioche elevates any dish it graces. Imagine using it for the most decadent French toast you’ve ever had, soaking up all that eggy custard and then pan-frying it to golden perfection. Or picture crafting the ultimate grilled cheese sandwich, where the buttery brioche perfectly complements the melted cheese. And don’t even get me started on using it for bread pudding the possibilities are endless!
But the versatility doesn’t stop there. Feel free to experiment with variations to make this recipe your own. For a sweeter treat, add a handful of chocolate chips or dried cranberries to the dough before the final proof. If you’re feeling adventurous, try incorporating some citrus zest, like lemon or orange, for a bright and refreshing flavor. You could even add a swirl of cinnamon sugar before baking for a delightful cinnamon brioche loaf. For a savory twist, consider adding some herbs like rosemary or thyme, or even some grated Parmesan cheese to the dough. The beauty of this Homemade Brioche Bread is that it’s a blank canvas for your culinary creativity.
Serving suggestions are just as diverse. Of course, a simple slice with butter and jam is always a winner. But you can also use it to make incredible sandwiches, from classic ham and cheese to more elaborate creations with roasted vegetables and pesto. It’s also fantastic as a side dish with soups and stews, providing a soft and comforting contrast to the heartiness of the meal. And let’s not forget about using it for croutons the buttery flavor adds a special touch to any salad.
I know that baking bread can sometimes seem intimidating, but I promise you, this recipe is worth the effort. I’ve broken it down into easy-to-follow steps, and I’m confident that even beginner bakers can achieve success. The key is to be patient and trust the process. Let the dough rise properly, and don’t be afraid to experiment with different variations.
So, what are you waiting for? Preheat your oven, gather your ingredients, and get ready to embark on a baking adventure. I’m so excited for you to try this Homemade Brioche Bread recipe and experience the joy of creating something truly special.
And most importantly, I want to hear about your experience! Did you try any variations? What did you serve it with? What did your family and friends think? Share your photos and stories in the comments below. I can’t wait to see what you create! Happy baking! I am sure you will love this recipe as much as I do. Let me know if you have any questions, I am always happy to help.
Homemade Brioche Bread: The Ultimate Guide to Baking Success
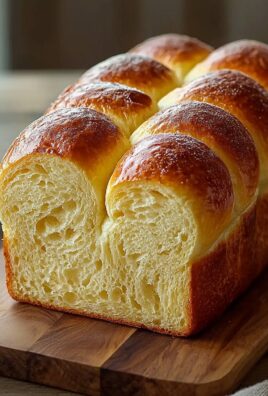
Rich, buttery homemade brioche bread with a light, airy texture thanks to a flavorful poolish. Perfect for sandwiches, toast, or enjoying on its own.
Ingredients
- 1 cup (125g) all-purpose flour
- 1 cup (240ml) lukewarm water
- 1/4 teaspoon instant dry yeast
- 4 cups (500g) all-purpose flour, plus more for dusting
- 1/2 cup (100g) granulated sugar
- 1 1/2 teaspoons salt
- 2 teaspoons instant dry yeast
- 1/2 cup (120ml) lukewarm milk
- 4 large eggs, lightly beaten
- 1 cup (226g) unsalted butter, softened but still cool, cut into 1-tablespoon pieces
- 1 large egg
- 1 tablespoon milk or cream
Instructions
- In a medium bowl, whisk together the 1 cup of all-purpose flour, 1 cup of lukewarm water, and 1/4 teaspoon of instant dry yeast until smooth. Make sure there are no lumps of flour remaining.
- Cover the bowl tightly with plastic wrap and let it rest at room temperature for at least 2 hours, or preferably overnight (8-12 hours). You’ll know it’s ready when it’s bubbly and has nearly doubled in size. It should have a slightly tangy aroma. If you let it rest overnight, the poolish may deflate slightly, which is perfectly fine.
- In the bowl of a stand mixer fitted with the dough hook attachment, combine the 4 cups of all-purpose flour, 1/2 cup of granulated sugar, 1 1/2 teaspoons of salt, and 2 teaspoons of instant dry yeast. Whisk them together to ensure everything is evenly distributed. This helps the yeast activate properly and the salt to not inhibit the yeast.
- Add the lukewarm milk, lightly beaten eggs, and the prepared poolish to the dry ingredients. Mix on low speed until the dough comes together. It will be shaggy and sticky at this point, and that’s perfectly normal.
- With the mixer still on low speed, add the softened butter, one tablespoon at a time, allowing each piece to be fully incorporated into the dough before adding the next. This process will take some time, about 10-15 minutes. Don’t rush it! The dough will gradually become smoother and more elastic.
- Once all the butter has been added, increase the mixer speed to medium-low and knead the dough for 8-10 minutes. The dough should be smooth, elastic, and slightly tacky. It will still be a bit sticky, but it should pull away from the sides of the bowl. If the dough is too sticky, add a tablespoon of flour at a time until it reaches the desired consistency. Be careful not to add too much flour, as this will make the brioche tough.
- Lightly grease a large bowl with oil or cooking spray. Transfer the dough to the bowl, turning to coat. Cover the bowl tightly with plastic wrap and let it rise in a warm place for 1-1.5 hours, or until doubled in size. You can also let it rise in the refrigerator for a longer, slower rise (8-12 hours), which will develop even more flavor.
- Gently punch down the dough to release the air. Turn the dough out onto a lightly floured surface.
- Now, you can shape the dough into whatever form you like! Here are a few options:
- Loaf: Divide the dough into three equal pieces. Roll each piece into a long rope. Braid the ropes together and place the braid in a greased 9×5 inch loaf pan.
- Dinner Rolls: Divide the dough into 12-16 equal pieces. Roll each piece into a ball and place them in a greased baking dish, leaving a little space between each roll.
- Brioche Buns: Divide the dough into equal pieces depending on the size of buns you want. Shape each piece into a ball. Use your thumb to make a deep indentation in the center of each ball. Place the buns on a baking sheet lined with parchment paper.
- Cover the shaped dough loosely with plastic wrap and let it rise in a warm place for another 45-60 minutes, or until almost doubled in size. This is a crucial step for achieving a light and airy brioche.
- Preheat your oven to 350°F (175°C). Make sure your oven rack is in the center position.
- In a small bowl, whisk together the egg and milk or cream. This will give the brioche a beautiful golden-brown color and a shiny crust.
- Gently brush the top of the risen brioche with the egg wash. Be careful not to deflate the dough. You can apply a second coat of egg wash for an even deeper color.
- Bake the brioche for 30-35 minutes, or until golden brown and the internal temperature reaches 190-200°F (88-93°C). If the top of the brioche is browning too quickly, you can tent it with aluminum foil during the last 10-15 minutes of baking.
- Remove the brioche from the oven and let it cool in the pan for 10 minutes before transferring it to a wire rack to cool completely. This will prevent the bottom from becoming soggy.
Notes
- The poolish is a crucial step for developing flavor and a light texture. Don’t skip it!
- Adding the butter slowly is essential for a rich and tender brioche. Be patient and allow each piece to fully incorporate.
- The dough will be sticky, but avoid adding too much flour, as this will make the brioche tough.
- A longer, slower rise in the refrigerator will develop even more flavor.
- If the top of the brioche is browning too quickly, tent it with aluminum foil during the last 10-15 minutes of baking.

Leave a Comment