
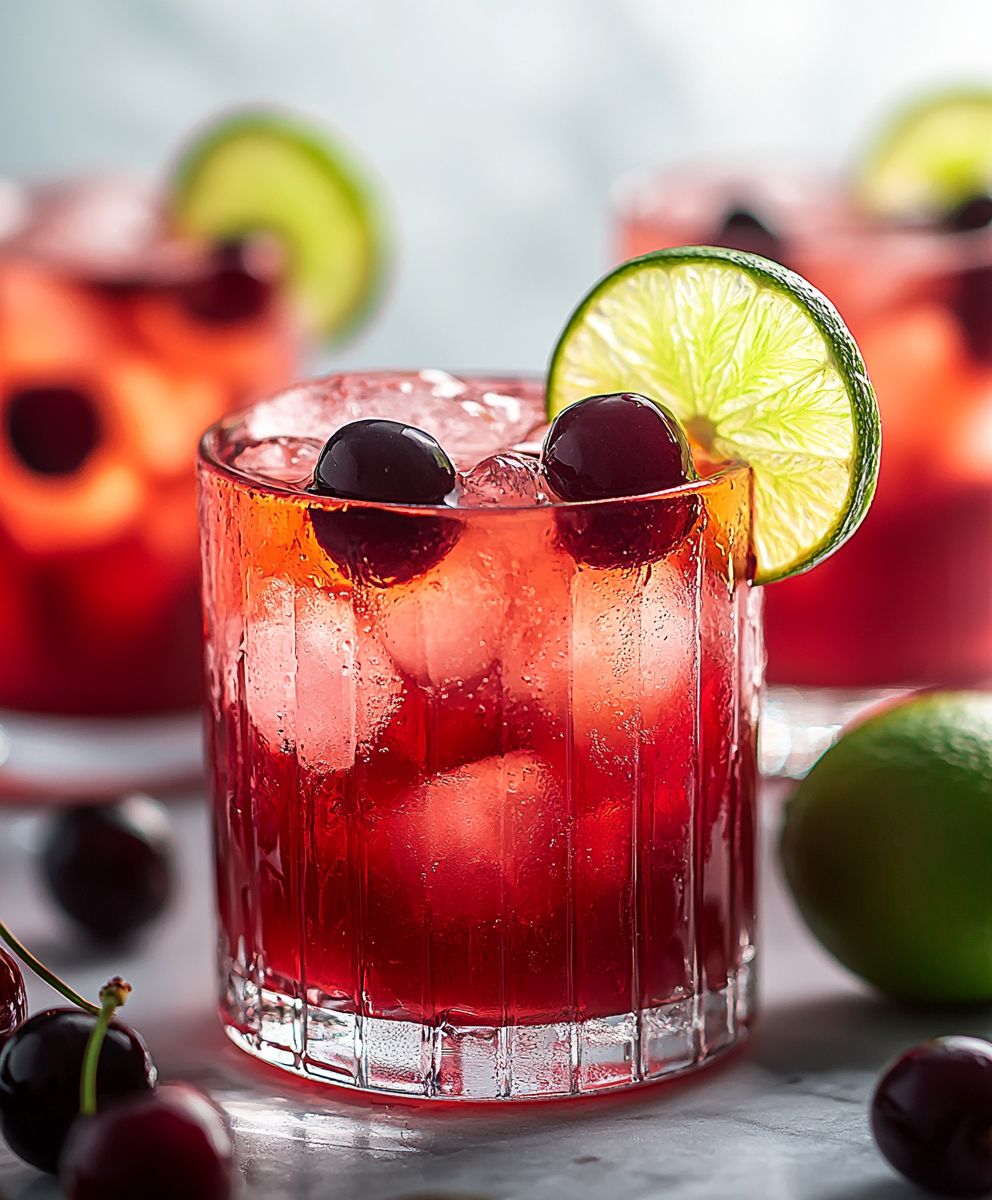
Cherry Limeade: Prepare to pucker up and cool down with the most refreshingly delicious drink you’ll make all summer! Forget those sugary, store-bought versions we’re talking about a homemade elixir bursting with real fruit flavor that will tantalize your taste buds. Imagine the sweet tang of ripe cherries perfectly balanced with the zesty kick of fresh lime, all swirled together with a touch of sweetness. It’s pure sunshine in a glass!
While the exact origins of cherry limeade are a bit hazy, the combination of tart citrus and sweet fruit has been a beloved refreshment for generations. Think of old-fashioned soda fountains and summer picnics cherry limeade evokes a sense of nostalgia and simple pleasures. It’s a drink that transcends trends, remaining a timeless favorite for both young and old.
What makes this cherry limeade so irresistible? It’s the perfect harmony of flavors, the vibrant color, and the sheer ease of preparation. It’s incredibly versatile, too! Enjoy it as a simple afternoon treat, serve it at your next barbecue, or even add a splash of your favorite spirit for a delightful cocktail. The possibilities are endless. Plus, you control the sweetness, making it a healthier and more satisfying alternative to commercially produced drinks. So, ditch the artificial flavors and embrace the real deal you won’t regret it!

Ingredients:
- 1 cup fresh or frozen sweet cherries, pitted
- 1 cup fresh lime juice (about 8-10 limes, depending on size)
- 1 cup granulated sugar (adjust to taste)
- 6 cups cold water, plus more to adjust concentration
- Lime slices, for garnish
- Cherry, for garnish (optional)
- Ice cubes
Making the Cherry Syrup
Okay, let’s get started! The first thing we’re going to do is create a delicious cherry syrup. This is the heart of our Cherry Limeade, and it’s what gives it that beautiful color and intense cherry flavor. Don’t worry, it’s super easy!
- Combine Cherries and Sugar: In a medium saucepan, combine the pitted cherries and granulated sugar. If you’re using frozen cherries, you don’t need to thaw them first. Just toss them in the pan with the sugar.
- Cook Over Medium Heat: Place the saucepan over medium heat. As the mixture heats up, the cherries will start to release their juices. Stir occasionally to prevent the sugar from sticking to the bottom of the pan.
- Simmer Until Cherries Soften: Continue to simmer the mixture for about 10-15 minutes, or until the cherries are very soft and have released most of their juices. You should be able to easily mash them with the back of a spoon. The mixture will thicken slightly as it simmers.
- Mash the Cherries: Once the cherries are soft, use a potato masher or the back of a spoon to thoroughly mash them. This will help to release even more flavor and color into the syrup. Don’t be shy really get in there and mash them up!
- Strain the Syrup (Optional): For a smoother syrup, you can strain the mixture through a fine-mesh sieve lined with cheesecloth. This will remove any solids and leave you with a clear, vibrant cherry syrup. If you don’t mind a little texture, you can skip this step. I personally like a little bit of cherry pulp in my limeade, so I often skip the straining. To strain, place the sieve over a bowl and pour the cherry mixture into the sieve. Let the syrup drip through, pressing gently on the solids to extract as much liquid as possible. Discard the solids.
- Cool the Syrup: Let the cherry syrup cool completely before using it. You can speed up the cooling process by placing the saucepan in an ice bath or transferring the syrup to a heat-safe container and refrigerating it. Cooling the syrup is important because it will prevent it from melting the ice in your limeade later.
Preparing the Lime Juice
While the cherry syrup is cooling, let’s get the lime juice ready. Freshly squeezed lime juice is key to a truly delicious Cherry Limeade. Bottled lime juice just doesn’t compare in terms of flavor and freshness. Trust me, it’s worth the extra effort!
- Gather Your Limes: You’ll need about 8-10 limes to get 1 cup of fresh lime juice, depending on their size and juiciness. Choose limes that are heavy for their size, as this indicates they are full of juice.
- Roll the Limes: Before juicing, roll the limes firmly on a countertop or cutting board. This helps to break down the membranes inside and release more juice.
- Juice the Limes: Use a citrus juicer (either a handheld squeezer or an electric juicer) to juice the limes. Be sure to catch any seeds that may fall into the juice.
- Strain the Lime Juice: Strain the lime juice through a fine-mesh sieve to remove any seeds or pulp. This will give you a smoother, cleaner-tasting limeade.
Assembling the Cherry Limeade
Now for the fun part putting it all together! This is where the magic happens, and you get to see your hard work pay off. Get ready to enjoy a refreshing and delicious Cherry Limeade!
- Combine Syrup and Lime Juice: In a large pitcher, combine the cooled cherry syrup and the fresh lime juice. Stir well to combine.
- Add Water: Add 6 cups of cold water to the pitcher. Stir well to combine.
- Adjust Sweetness (If Needed): Taste the limeade and adjust the sweetness to your liking. If it’s too tart, add a little more sugar, one tablespoon at a time, until you reach your desired sweetness. If it’s too sweet, add a little more lime juice or water.
- Chill the Limeade: For the best flavor, chill the limeade in the refrigerator for at least 30 minutes before serving. This will allow the flavors to meld together and create a more cohesive and refreshing drink.
- Serve and Garnish: Fill glasses with ice cubes. Pour the Cherry Limeade over the ice. Garnish with lime slices and cherries, if desired. Serve immediately and enjoy!
Tips and Variations
Want to take your Cherry Limeade to the next level? Here are a few tips and variations to try:
- Sparkling Cherry Limeade: Substitute sparkling water or club soda for the regular water for a bubbly and refreshing twist.
- Cherry Limeade Mocktail: Add a splash of grenadine for extra sweetness and a vibrant red color.
- Cherry Limeade Cocktail: Add a shot of vodka or rum for an adult version of this classic drink.
- Frozen Cherry Limeade: Blend the limeade with ice for a frozen treat.
- Use Different Types of Cherries: Experiment with different types of cherries, such as Rainier cherries or Bing cherries, to create different flavor profiles.
- Add Herbs: Infuse the cherry syrup with fresh herbs like mint or basil for a unique and aromatic flavor.
- Make it Spicy: Add a pinch of cayenne pepper to the cherry syrup for a subtle kick.
- Adjust the Sweetness: The amount of sugar you need will depend on the sweetness of your cherries and your personal preference. Start with 1 cup and adjust as needed. You can also use a sugar substitute like stevia or erythritol.
- Make it Ahead: The cherry syrup can be made ahead of time and stored in the refrigerator for up to a week. This makes it easy to whip up a batch of Cherry Limeade whenever you’re in the mood for a refreshing drink.
- Presentation Matters: Use pretty glasses and garnishes to make your Cherry Limeade even more appealing. A sprig of mint, a lime wedge, or a few fresh cherries can make all the difference.
Storing Leftovers
If you have any leftover Cherry Limeade, you can store it in the refrigerator for up to 3 days. The flavor may diminish slightly over time, but it will still be delicious. Be sure to stir it well before serving, as the ingredients may separate slightly.
Why This Recipe Works
This recipe works because it uses fresh, high-quality ingredients and a simple, straightforward method. The cherry syrup is the key to the flavor, and the fresh lime juice adds a bright, tart counterpoint. The balance of sweetness and tartness is perfect, and the limeade is incredibly refreshing. Plus, it’s easy to customize to your own taste preferences. Whether you like it sweeter, tarter, or more bubbly, you can easily adjust the ingredients to create your perfect Cherry Limeade.
I hope you enjoy this recipe as much as I do! It’s the perfect drink for a hot summer day, a backyard barbecue, or any time you’re craving something refreshing and delicious. Cheers!
Conclusion:
So there you have it! This Cherry Limeade recipe isn’t just another drink; it’s a burst of sunshine in a glass, a nostalgic trip to carefree summer days, and a guaranteed crowd-pleaser. I truly believe this is a must-try recipe because it’s incredibly easy to make, requires minimal ingredients, and delivers maximum flavor. Forget those sugary, artificial-tasting store-bought versions this homemade Cherry Limeade is the real deal, offering a refreshing and naturally sweet experience that you can feel good about.
But the best part? It’s incredibly versatile! While it’s absolutely divine served ice-cold on its own, you can easily elevate it to a sophisticated cocktail by adding a splash of vodka or rum. Imagine sipping a Cherry Limeade cocktail on a warm evening pure bliss! For a non-alcoholic twist, try adding sparkling water or club soda for extra fizz. And if you’re feeling adventurous, why not experiment with different fruits? A few raspberries or strawberries would complement the cherry and lime beautifully, creating a unique and flavorful variation. You could even add a sprig of mint or basil for an herbaceous touch.
Serving Suggestions: Think beyond just a simple glass! This Cherry Limeade is perfect for parties, picnics, barbecues, or even just a relaxing afternoon treat. Serve it in mason jars with striped straws for a rustic touch, or in elegant glasses with a lime wedge for a more sophisticated presentation. You can even freeze it into popsicles for a refreshing summer treat that kids (and adults!) will love. For a truly special occasion, consider making a Cherry Limeade punch bowl, complete with sliced limes, cherries, and maybe even a few edible flowers. The possibilities are endless!
Variations to Explore: Don’t be afraid to get creative! If you prefer a sweeter drink, add a little more sugar or honey to taste. If you like it tart, increase the amount of lime juice. For a spicy kick, try adding a pinch of cayenne pepper or a few slices of jalapeño. And if you’re looking for a healthier option, you can use a sugar substitute like stevia or erythritol. You can also experiment with different types of cherries sweet cherries will result in a sweeter limeade, while tart cherries will add a more complex flavor. Remember, the best recipes are the ones that you make your own, so don’t hesitate to adjust this Cherry Limeade recipe to suit your personal preferences.
I’m so excited for you to try this recipe and experience the refreshing goodness of homemade Cherry Limeade. It’s a simple pleasure that can bring so much joy, especially on a hot day. I’m confident that you’ll love it as much as I do. So, gather your ingredients, grab your blender or juicer, and get ready to create a truly unforgettable drink.
Now, it’s your turn! I’d absolutely love to hear about your experience making this Cherry Limeade. Did you try any of the variations I suggested? Did you add your own special twist? What did your friends and family think? Please, don’t hesitate to share your thoughts, comments, and photos in the comments section below. Your feedback is invaluable, and it helps me to create even better recipes in the future. Happy mixing, and cheers to a delicious and refreshing summer!
Cherry Limeade: The Ultimate Refreshing Summer Drink Recipe
Refreshing homemade Cherry Limeade with fresh cherries, lime juice, and a touch of sweetness. Perfect for summer!
Ingredients
- 1 cup fresh or frozen sweet cherries, pitted
- 1 cup fresh lime juice (about 8-10 limes, depending on size)
- 1 cup granulated sugar (adjust to taste)
- 6 cups cold water, plus more to adjust concentration
- Lime slices, for garnish
- Cherries, for garnish (optional)
- Ice cubes
Instructions
- Combine Cherries and Sugar: In a medium saucepan, combine the pitted cherries and granulated sugar. If you’re using frozen cherries, you don’t need to thaw them first. Just toss them in the pan with the sugar.
- Cook Over Medium Heat: Place the saucepan over medium heat. As the mixture heats up, the cherries will start to release their juices. Stir occasionally to prevent the sugar from sticking to the bottom of the pan.
- Simmer Until Cherries Soften: Continue to simmer the mixture for about 10-15 minutes, or until the cherries are very soft and have released most of their juices. You should be able to easily mash them with the back of a spoon. The mixture will thicken slightly as it simmers.
- Mash the Cherries: Once the cherries are soft, use a potato masher or the back of a spoon to thoroughly mash them. This will help to release even more flavor and color into the syrup. Don’t be shy really get in there and mash them up!
- Strain the Syrup (Optional): For a smoother syrup, you can strain the mixture through a fine-mesh sieve lined with cheesecloth. This will remove any solids and leave you with a clear, vibrant cherry syrup. If you don’t mind a little texture, you can skip this step. I personally like a little bit of cherry pulp in my limeade, so I often skip the straining. To strain, place the sieve over a bowl and pour the cherry mixture into the sieve. Let the syrup drip through, pressing gently on the solids to extract as much liquid as possible. Discard the solids.
- Cool the Syrup: Let the cherry syrup cool completely before using it. You can speed up the cooling process by placing the saucepan in an ice bath or transferring the syrup to a heat-safe container and refrigerating it. Cooling the syrup is important because it will prevent it from melting the ice in your limeade later.
- Gather Your Limes: You’ll need about 8-10 limes to get 1 cup of fresh lime juice, depending on their size and juiciness. Choose limes that are heavy for their size, as this indicates they are full of juice.
- Roll the Limes: Before juicing, roll the limes firmly on a countertop or cutting board. This helps to break down the membranes inside and release more juice.
- Juice the Limes: Use a citrus juicer (either a handheld squeezer or an electric juicer) to juice the limes. Be sure to catch any seeds that may fall into the juice.
- Strain the Lime Juice: Strain the lime juice through a fine-mesh sieve to remove any seeds or pulp. This will give you a smoother, cleaner-tasting limeade.
- Combine Syrup and Lime Juice: In a large pitcher, combine the cooled cherry syrup and the fresh lime juice. Stir well to combine.
- Add Water: Add 6 cups of cold water to the pitcher. Stir well to combine.
- Adjust Sweetness (If Needed): Taste the limeade and adjust the sweetness to your liking. If it’s too tart, add a little more sugar, one tablespoon at a time, until you reach your desired sweetness. If it’s too sweet, add a little more lime juice or water.
- Chill the Limeade: For the best flavor, chill the limeade in the refrigerator for at least 30 minutes before serving. This will allow the flavors to meld together and create a more cohesive and refreshing drink.
- Serve and Garnish: Fill glasses with ice cubes. Pour the Cherry Limeade over the ice. Garnish with lime slices and cherries, if desired. Serve immediately and enjoy!
Notes
- For a sparkling limeade, substitute sparkling water or club soda for the regular water.
- Add a splash of grenadine for extra sweetness and color.
- For an adult version, add a shot of vodka or rum.
- Blend with ice for a frozen treat.
- Experiment with different types of cherries.
- Infuse the cherry syrup with fresh herbs like mint or basil.
- Add a pinch of cayenne pepper to the cherry syrup for a subtle kick.
- Adjust the sweetness to your preference.
- The cherry syrup can be made ahead of time and stored in the refrigerator for up to a week.
- Use pretty glasses and garnishes for presentation.
- Leftover limeade can be stored in the refrigerator for up to 3 days.


Leave a Comment