
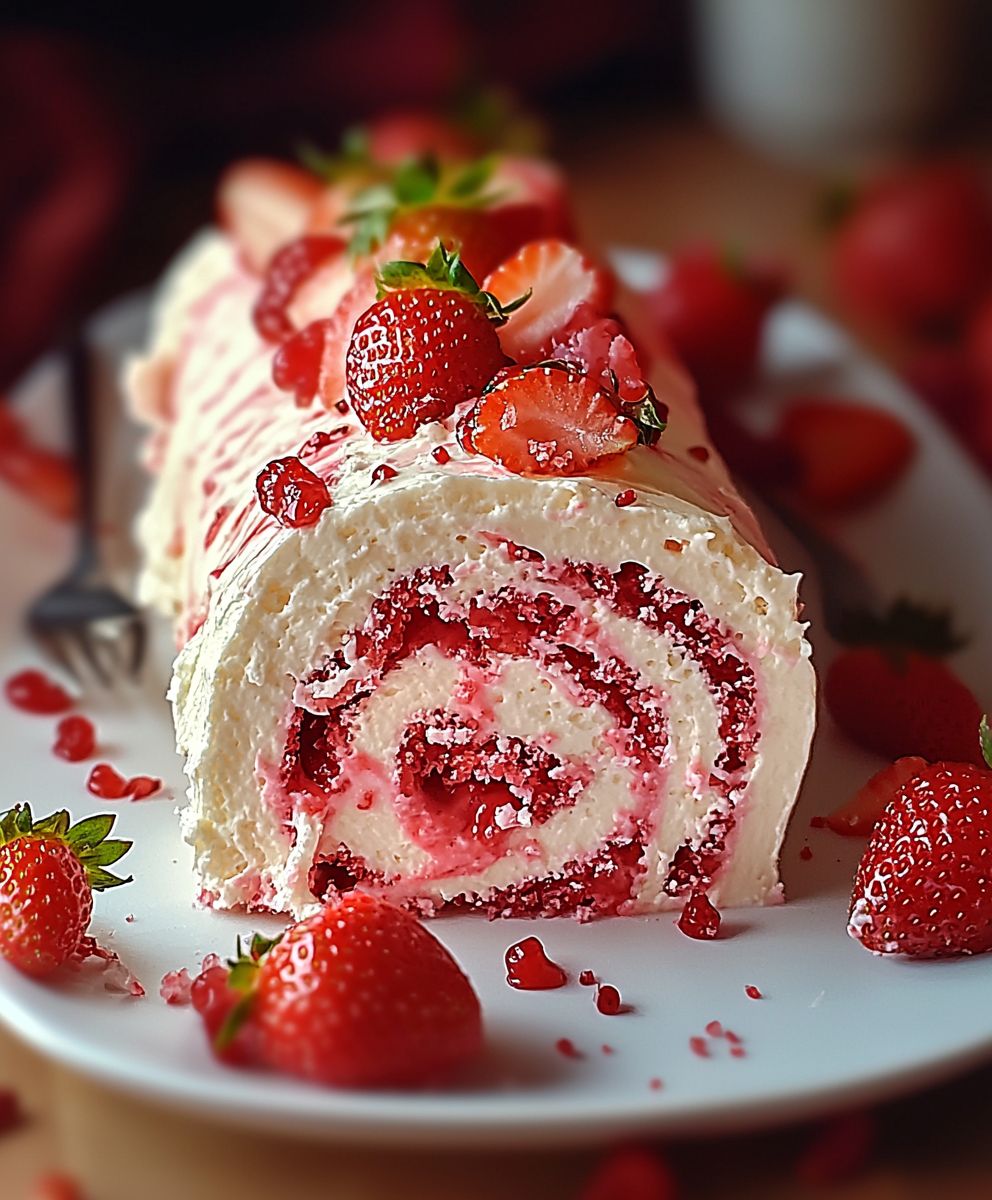
Strawberry birthday cake: just the words conjure up images of sunshine, celebration, and the sweet, juicy taste of summer! Forget those overly sweet, artificially flavored cakes from the store. We’re diving headfirst into a homemade masterpiece that will have everyone begging for seconds. Have you ever wondered why a simple cake can hold so much significance? Birthday cakes, in their various forms, have been a part of celebrations for centuries, evolving from simple bread-like offerings to the elaborate creations we see today. The addition of strawberries, a fruit associated with love and abundance since Roman times, elevates this cake to something truly special.
What makes a strawberry birthday cake so irresistible? It’s the perfect balance of flavors and textures. The light and airy sponge cake, the creamy frosting, and the burst of fresh, tart strawberries create a symphony in your mouth. Plus, let’s be honest, a homemade cake is a labor of love, and that extra touch of care shines through in every bite. This isn’t just a dessert; it’s a memory in the making, a centerpiece for joy, and a delicious way to say “Happy Birthday!” So, grab your apron, and let’s get baking!

Ingredients:
- For the Cake:
- 3 cups all-purpose flour
- 1 tablespoon baking powder
- 1 teaspoon baking soda
- 1 teaspoon salt
- 1 cup (2 sticks) unsalted butter, softened
- 2 cups granulated sugar
- 4 large eggs
- 1 teaspoon vanilla extract
- 1 cup buttermilk
- 1 cup strawberry puree (from about 1 pound fresh strawberries)
- 1/4 cup vegetable oil
- Pink food coloring (optional, for a more vibrant color)
- For the Strawberry Filling:
- 2 pounds fresh strawberries, hulled and sliced
- 1/2 cup granulated sugar
- 2 tablespoons cornstarch
- 1/4 cup water
- 1 tablespoon lemon juice
- For the Vanilla Buttercream Frosting:
- 1 cup (2 sticks) unsalted butter, softened
- 4 cups powdered sugar
- 1/2 cup heavy cream
- 2 teaspoons vanilla extract
- Pinch of salt
- For Decoration (Optional):
- Fresh strawberries, for garnish
- Sprinkles
- Edible glitter
Preparing the Strawberry Filling:
- Combine Strawberries and Sugar: In a medium saucepan, combine the sliced strawberries and 1/2 cup of granulated sugar. Stir gently to coat the strawberries. Let this mixture sit for about 15-20 minutes. This allows the strawberries to macerate and release their juices, creating a more flavorful filling.
- Cook the Strawberries: Place the saucepan over medium heat. Bring the strawberry mixture to a simmer, stirring occasionally. As the strawberries heat up, they will release more juice.
- Make a Cornstarch Slurry: In a small bowl, whisk together the cornstarch and water until smooth. This slurry will help thicken the strawberry filling. Make sure there are no lumps in the slurry.
- Thicken the Filling: Slowly pour the cornstarch slurry into the simmering strawberry mixture, stirring constantly. Continue to cook for 1-2 minutes, or until the filling has thickened to your desired consistency. It should be thick enough to coat the back of a spoon.
- Add Lemon Juice: Remove the saucepan from the heat and stir in the lemon juice. The lemon juice brightens the flavor of the strawberries and adds a touch of acidity.
- Cool the Filling: Transfer the strawberry filling to a bowl and let it cool completely. You can speed up the cooling process by placing the bowl in the refrigerator. Make sure the filling is completely cool before assembling the cake, otherwise it will melt the frosting.
Making the Strawberry Cake:
- Preheat Oven and Prepare Pans: Preheat your oven to 350°F (175°C). Grease and flour three 8-inch round cake pans. You can also line the bottoms of the pans with parchment paper rounds for easy removal. This will prevent the cakes from sticking to the pans.
- Whisk Dry Ingredients: In a large bowl, whisk together the flour, baking powder, baking soda, and salt. Whisking ensures that the baking powder and baking soda are evenly distributed throughout the flour, which is crucial for a light and fluffy cake.
- Cream Butter and Sugar: In a separate large bowl, cream together the softened butter and granulated sugar until light and fluffy. This usually takes about 3-5 minutes with an electric mixer. Creaming the butter and sugar incorporates air into the mixture, which contributes to the cake’s texture.
- Add Eggs: Beat in the eggs one at a time, mixing well after each addition. Then, stir in the vanilla extract. Make sure each egg is fully incorporated before adding the next.
- Combine Wet and Dry Ingredients: In a small bowl, whisk together the buttermilk, strawberry puree, and vegetable oil. Gradually add the wet ingredients to the dry ingredients, alternating with the dry ingredients, beginning and ending with the dry ingredients. Mix until just combined. Be careful not to overmix the batter, as this can result in a tough cake.
- Add Food Coloring (Optional): If you want a more vibrant pink color, add a few drops of pink food coloring to the batter and mix until evenly colored.
- Divide Batter: Divide the batter evenly among the prepared cake pans. Use a kitchen scale to ensure that each pan has the same amount of batter, which will help the cakes bake evenly.
- Bake: Bake for 25-30 minutes, or until a toothpick inserted into the center comes out clean. The baking time may vary depending on your oven, so start checking for doneness around 25 minutes.
- Cool Cakes: Let the cakes cool in the pans for 10 minutes before inverting them onto a wire rack to cool completely. Make sure the cakes are completely cool before frosting them.
Preparing the Vanilla Buttercream Frosting:
- Cream Butter: In a large bowl, cream the softened butter until smooth and fluffy. This usually takes about 3-5 minutes with an electric mixer.
- Add Powdered Sugar: Gradually add the powdered sugar, one cup at a time, beating well after each addition. Start on low speed to prevent the powdered sugar from flying everywhere.
- Add Heavy Cream and Vanilla: Add the heavy cream, vanilla extract, and salt. Beat until the frosting is light and fluffy. If the frosting is too thick, add a little more heavy cream, one tablespoon at a time, until you reach your desired consistency. If the frosting is too thin, add a little more powdered sugar.
- Whip: Continue to whip the frosting for another 2-3 minutes to make it extra light and airy.
Assembling the Strawberry Birthday Cake:
- Level the Cakes: If the cakes have domed on top, use a serrated knife to level them. This will ensure that the cake is stable and that the layers are even.
- Place First Layer: Place one cake layer on a serving plate or cake stand.
- Frost and Fill: Spread a generous layer of vanilla buttercream frosting over the first cake layer. Then, spread a layer of the cooled strawberry filling over the frosting.
- Add Second Layer: Carefully place the second cake layer on top of the filling.
- Repeat Frosting and Filling: Repeat the frosting and filling process with the second layer. Spread a layer of vanilla buttercream frosting, followed by a layer of strawberry filling.
- Add Third Layer: Place the final cake layer on top.
- Crumb Coat: Apply a thin layer of vanilla buttercream frosting over the entire cake. This is called a crumb coat and it helps to seal in any loose crumbs. Refrigerate the cake for 30 minutes to allow the crumb coat to set.
- Final Frosting: Apply a final, thicker layer of vanilla buttercream frosting over the entire cake. Smooth the frosting with a spatula or cake smoother.
- Decorate: Decorate the cake with fresh strawberries, sprinkles, edible glitter, or any other decorations you like. Get creative and have fun!
- Chill: Refrigerate the cake for at least 30 minutes before serving. This will allow the frosting to set and the flavors to meld together.
- Serve: Slice and serve the strawberry birthday cake. Enjoy!
Conclusion:
This strawberry birthday cake isn’t just a dessert; it’s a celebration waiting to happen! From the moist, tender crumb infused with real strawberry flavor to the luscious, creamy frosting, every bite is a burst of summer sunshine. I truly believe this recipe deserves a spot in your baking repertoire. It’s surprisingly simple to make, even for novice bakers, and the results are guaranteed to impress. Forget store-bought cakes loaded with artificial flavors and preservatives; this homemade version is bursting with fresh, vibrant taste that you just can’t replicate. Why is this a must-try? Because it’s more than just a cake; it’s an experience. The aroma that fills your kitchen as it bakes is intoxicating, and the look on your loved ones’ faces when they taste it for the first time will be priceless. It’s the perfect centerpiece for any birthday celebration, adding a touch of homemade love and care that makes all the difference. Plus, it’s incredibly versatile! Looking for serving suggestions? A simple dusting of powdered sugar is elegant and understated, allowing the strawberry flavor to truly shine. Or, for a more decadent treat, try topping each slice with a dollop of freshly whipped cream and a few extra sliced strawberries. A drizzle of balsamic glaze adds a sophisticated touch that complements the sweetness of the berries beautifully. And don’t be afraid to experiment with variations! If you’re feeling adventurous, try adding a layer of strawberry jam between the cake layers for an extra burst of flavor. You could also incorporate other berries, like raspberries or blueberries, for a mixed berry sensation. For a chocolate twist, add a tablespoon or two of cocoa powder to the cake batter. Or, if you’re short on time, you can even use a boxed cake mix as a base and simply add the strawberry puree and frosting for a semi-homemade version that still tastes amazing. Consider using different types of frosting too! While I adore the classic cream cheese frosting, a Swiss meringue buttercream would be equally delicious and provide a smoother, silkier texture. A simple vanilla buttercream is always a crowd-pleaser, or you could even try a strawberry-infused buttercream for an extra layer of strawberry goodness. I’m confident that this strawberry birthday cake will become a family favorite. It’s the perfect way to celebrate birthdays, anniversaries, or any special occasion. It’s also a wonderful way to use up those fresh, seasonal strawberries during the summer months. So, what are you waiting for? Gather your ingredients, preheat your oven, and get ready to bake! I promise you won’t be disappointed. And most importantly, have fun with it! Baking should be a joyful experience, so don’t be afraid to get creative and put your own personal touch on this recipe. I’m so excited for you to try this recipe and experience the joy of baking and sharing this delicious cake with your loved ones. Once you’ve made it, I would absolutely love to hear about your experience! Did you make any variations? What did your family and friends think? Share your photos and stories in the comments below I can’t wait to see your creations! Happy baking! Print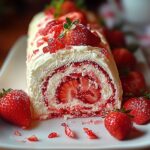
Strawberry Birthday Cake: The Ultimate Recipe and Decorating Guide
- Total Time: 240 minutes
- Yield: 12–16 servings 1x
Description
A delightful three-layer strawberry cake with homemade strawberry filling and creamy vanilla buttercream frosting. Perfect for birthdays or any special occasion!
Ingredients
- 3 cups all-purpose flour
- 1 tablespoon baking powder
- 1 teaspoon baking soda
- 1 teaspoon salt
- 1 cup (2 sticks) unsalted butter, softened
- 2 cups granulated sugar
- 4 large eggs
- 1 teaspoon vanilla extract
- 1 cup buttermilk
- 1 cup strawberry puree (from about 1 pound fresh strawberries)
- 1/4 cup vegetable oil
- Pink food coloring (optional, for a more vibrant color)
- 2 pounds fresh strawberries, hulled and sliced
- 1/2 cup granulated sugar
- 2 tablespoons cornstarch
- 1/4 cup water
- 1 tablespoon lemon juice
- 1 cup (2 sticks) unsalted butter, softened
- 4 cups powdered sugar
- 1/2 cup heavy cream
- 2 teaspoons vanilla extract
- Pinch of salt
- Fresh strawberries, for garnish
- Sprinkles
- Edible glitter
Instructions
- In a medium saucepan, combine the sliced strawberries and 1/2 cup of granulated sugar. Stir gently to coat the strawberries. Let this mixture sit for about 15-20 minutes. This allows the strawberries to macerate and release their juices, creating a more flavorful filling.
- Place the saucepan over medium heat. Bring the strawberry mixture to a simmer, stirring occasionally. As the strawberries heat up, they will release more juice.
- In a small bowl, whisk together the cornstarch and water until smooth. This slurry will help thicken the strawberry filling. Make sure there are no lumps in the slurry.
- Slowly pour the cornstarch slurry into the simmering strawberry mixture, stirring constantly. Continue to cook for 1-2 minutes, or until the filling has thickened to your desired consistency. It should be thick enough to coat the back of a spoon.
- Remove the saucepan from the heat and stir in the lemon juice. The lemon juice brightens the flavor of the strawberries and adds a touch of acidity.
- Transfer the strawberry filling to a bowl and let it cool completely. You can speed up the cooling process by placing the bowl in the refrigerator. Make sure the filling is completely cool before assembling the cake, otherwise it will melt the frosting.
- Preheat your oven to 350°F (175°C). Grease and flour three 8-inch round cake pans. You can also line the bottoms of the pans with parchment paper rounds for easy removal. This will prevent the cakes from sticking to the pans.
- In a large bowl, whisk together the flour, baking powder, baking soda, and salt. Whisking ensures that the baking powder and baking soda are evenly distributed throughout the flour, which is crucial for a light and fluffy cake.
- In a separate large bowl, cream together the softened butter and granulated sugar until light and fluffy. This usually takes about 3-5 minutes with an electric mixer. Creaming the butter and sugar incorporates air into the mixture, which contributes to the cake’s texture.
- Beat in the eggs one at a time, mixing well after each addition. Then, stir in the vanilla extract. Make sure each egg is fully incorporated before adding the next.
- In a small bowl, whisk together the buttermilk, strawberry puree, and vegetable oil. Gradually add the wet ingredients to the dry ingredients, alternating with the dry ingredients, beginning and ending with the dry ingredients. Mix until just combined. Be careful not to overmix the batter, as this can result in a tough cake.
- If you want a more vibrant pink color, add a few drops of pink food coloring to the batter and mix until evenly colored.
- Divide the batter evenly among the prepared cake pans. Use a kitchen scale to ensure that each pan has the same amount of batter, which will help the cakes bake evenly.
- Bake for 25-30 minutes, or until a toothpick inserted into the center comes out clean. The baking time may vary depending on your oven, so start checking for doneness around 25 minutes.
- Let the cakes cool in the pans for 10 minutes before inverting them onto a wire rack to cool completely. Make sure the cakes are completely cool before frosting them.
- In a large bowl, cream the softened butter until smooth and fluffy. This usually takes about 3-5 minutes with an electric mixer.
- Gradually add the powdered sugar, one cup at a time, beating well after each addition. Start on low speed to prevent the powdered sugar from flying everywhere.
- Add the heavy cream, vanilla extract, and salt. Beat until the frosting is light and fluffy. If the frosting is too thick, add a little more heavy cream, one tablespoon at a time, until you reach your desired consistency. If the frosting is too thin, add a little more powdered sugar.
- Continue to whip the frosting for another 2-3 minutes to make it extra light and airy.
- If the cakes have domed on top, use a serrated knife to level them. This will ensure that the cake is stable and that the layers are even.
- Place one cake layer on a serving plate or cake stand.
- Spread a generous layer of vanilla buttercream frosting over the first cake layer. Then, spread a layer of the cooled strawberry filling over the frosting.
- Carefully place the second cake layer on top of the filling.
- Repeat the frosting and filling process with the second layer. Spread a layer of vanilla buttercream frosting, followed by a layer of strawberry filling.
- Place the final cake layer on top.
- Apply a thin layer of vanilla buttercream frosting over the entire cake. This is called a crumb coat and it helps to seal in any loose crumbs. Refrigerate the cake for 30 minutes to allow the crumb coat to set.
- Apply a final, thicker layer of vanilla buttercream frosting over the entire cake. Smooth the frosting with a spatula or cake smoother.
- Decorate the cake with fresh strawberries, sprinkles, edible glitter, or any other decorations you like. Get creative and have fun!
- Refrigerate the cake for at least 30 minutes before serving. This will allow the frosting to set and the flavors to meld together.
- Slice and serve the strawberry birthday cake. Enjoy!
Notes
- Make sure all ingredients are at room temperature for best results, especially the butter and eggs.
- Don’t overmix the cake batter, as this can lead to a tough cake.
- Cool the cake layers completely before frosting to prevent the frosting from melting.
- The strawberry filling can be made a day ahead and stored in the refrigerator.
- Adjust the amount of pink food coloring to achieve your desired shade of pink.
- For a more intense strawberry flavor, add a teaspoon of strawberry extract to the cake batter.
- Prep Time: 60 minutes
- Cook Time: 30 minutes

Leave a Comment