
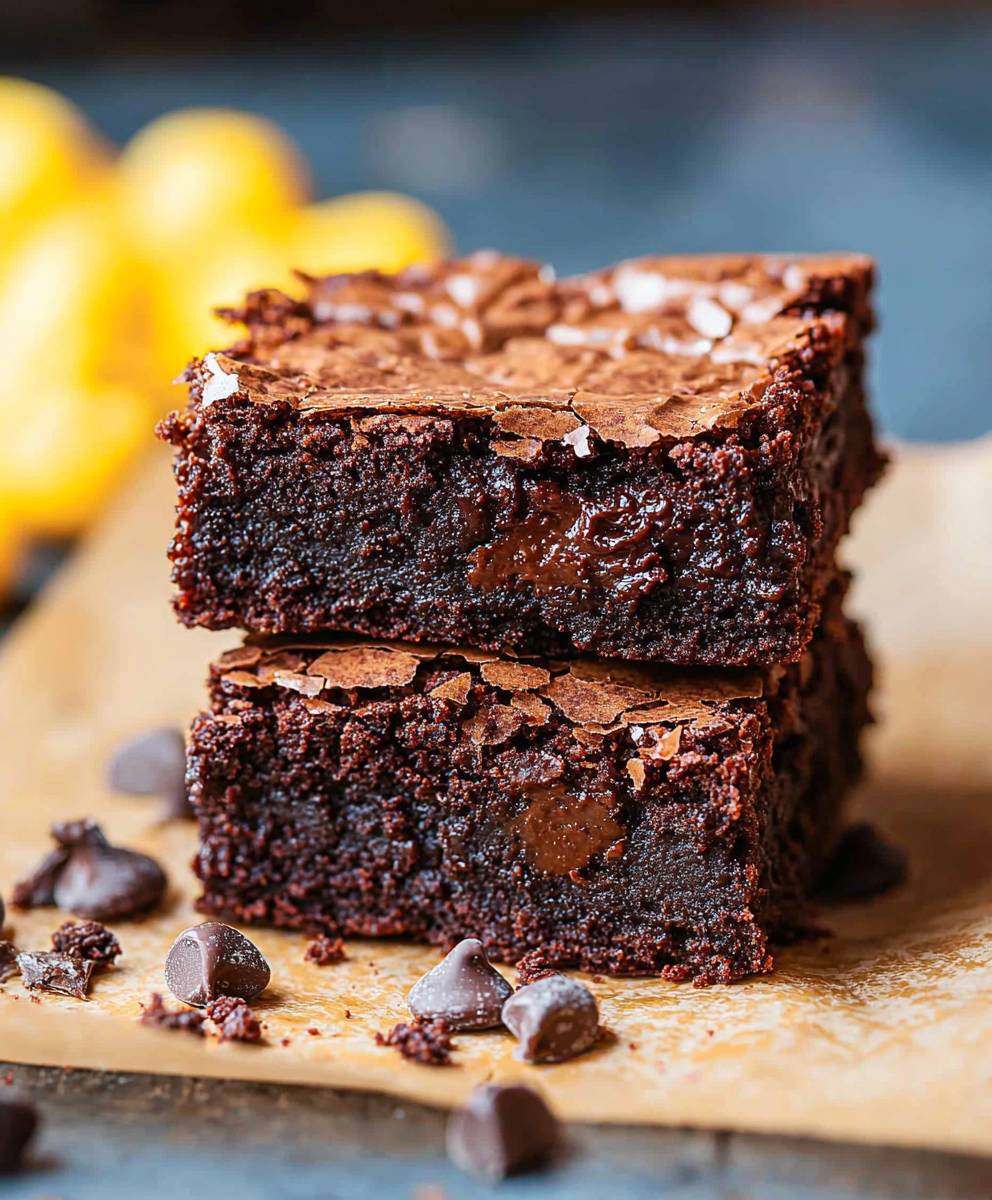
Grain-Free Nutella Brownies are a delightful treat that combines the rich, creamy goodness of Nutella with the indulgent texture of brownies, all while being free from grains. As someone who has always had a sweet tooth, I can confidently say that these brownies are a game-changer. They not only satisfy my chocolate cravings but also cater to those who are looking for gluten-free options without sacrificing flavor.
The history of brownies dates back to the early 20th century, and they have since become a beloved dessert in many households. However, the introduction of grain-free alternatives has made it possible for even more people to enjoy this classic treat. What I love most about Grain-Free Nutella Brownies is their fudgy texture and the way they melt in your mouth, leaving you wanting more. Plus, they are incredibly easy to whip up, making them a perfect choice for both special occasions and everyday indulgence. Join me as we dive into this delicious recipe that is sure to become a favorite in your home!

Ingredients:
- 1 cup almond flour
- 1/2 cup cocoa powder
- 1/2 teaspoon baking soda
- 1/4 teaspoon salt
- 1/2 cup coconut sugar (or brown sugar)
- 1/2 cup Nutella (or any hazelnut spread)
- 1/4 cup melted coconut oil (or unsalted butter)
- 2 large eggs
- 1 teaspoon vanilla extract
- 1/2 cup chocolate chips (optional, for extra fudginess)
Preparing the Batter
- Preheat your oven to 350°F (175°C). This is an essential step to ensure that your brownies bake evenly and come out perfectly fudgy.
- In a medium-sized mixing bowl, combine the dry ingredients: almond flour, cocoa powder, baking soda, and salt. Whisk them together until they are well blended. This helps to aerate the flour and cocoa, ensuring a light texture in your brownies.
- In a separate large mixing bowl, add the coconut sugar. Pour in the melted coconut oil and mix them together until the sugar is well incorporated. You can use a whisk or a spatula for this step.
- Next, add the Nutella to the sugar and oil mixture. Stir until its smooth and creamy. The Nutella will add a rich flavor and moisture to the brownies.
- Crack the eggs into the bowl and add the vanilla extract. Mix everything together until the mixture is smooth and glossy. This is where the magic happens, as the eggs will help bind the ingredients together and create that fudgy texture we all love.
- Now, gradually add the dry ingredients to the wet mixture. I like to do this in three parts, folding gently with a spatula after each addition. Be careful not to overmix; we want to keep that lovely fudgy texture!
- If youre feeling indulgent, fold in the chocolate chips at this stage. Theyll melt slightly during baking, creating pockets of gooey chocolate throughout the brownies.
Cooking Process
- Prepare an 8×8 inch (or 9×9 inch) baking pan by lining it with parchment paper. This will make it easier to remove the brownies once theyre baked. You can also lightly grease the pan with coconut oil or butter for extra assurance.
- Pour the brownie batter into the prepared pan, using a spatula to spread it evenly. Make sure to smooth out the top so that they bake evenly.
- Place the pan in the preheated oven and bake for 20-25 minutes. I recommend checking them at the 20-minute mark. You want the edges to look set, but the center should still be slightly soft. A toothpick inserted into the center should come out with a few moist crumbs, not completely clean.
- Once baked, remove the brownies from the oven and let them cool in the pan for about 10 minutes. This cooling time is crucial as it allows the brownies to firm up a bit before you cut them.
- After 10 minutes, carefully lift the brownies out of the pan using the parchment paper. Transfer them to a wire rack to cool completely. If you dont have a wire rack, you can simply place them on a cutting board.
Assembling and Serving
- Once the brownies are completely cool, its time to cut them into squares. I usually cut them into 16 squares, but you can make them larger or smaller depending on your preference.
- If you want to elevate your brownies, consider dusting them with a little powdered sugar or drizzling some melted chocolate on top. You can also serve them with a scoop of vanilla ice cream for a delicious dessert.
- Store any leftovers in an airtight container at room temperature for up to 3 days, or in the fridge for up to a week. If you want to keep them longer, you can freeze them for up to 3 months. Just make sure to wrap them tightly in plastic wrap and then place them in a freezer-safe bag.
Tips for Perfect Brownies
Conclusion:
In summary, these Grain-Free Nutella Brownies are an absolute must-try for anyone looking to indulge in a rich, chocolatey treat without the guilt of traditional ingredients. The combination of creamy Nutella and wholesome, grain-free alternatives creates a fudgy texture that is simply irresistible. Plus, they are incredibly easy to whip up, making them perfect for both seasoned bakers and kitchen novices alike. For serving suggestions, I love to pair these brownies with a scoop of vanilla ice cream or a dollop of whipped cream for an extra indulgent dessert. You can also sprinkle some sea salt on top for a delightful contrast to the sweetness, or even add a handful of chopped nuts for a bit of crunch. If you’re feeling adventurous, try swapping out the Nutella for your favorite nut butter or adding in some chocolate chips for an extra chocolatey kick! I encourage you to give this recipe a try and experience the deliciousness for yourself. Once you do, I would love to hear about your experience! Share your thoughts, any variations you tried, or even a photo of your creation. Let’s spread the joy of these Grain-Free Nutella Brownies together! Happy baking! PrintGrain-Free Nutella Brownies: Indulge in a Deliciously Healthy Treat
- Total Time: 40 minutes
- Yield: 16 brownies 1x
Description
These fudgy brownies made with almond flour and Nutella are a chocolate lover’s dream. Rich, moist, and easy to make, they offer a delightful treat that can be customized with chocolate chips or nuts. Perfect for any occasion!
Ingredients
- 1 cup almond flour
- 1/2 cup cocoa powder
- 1/2 teaspoon baking soda
- 1/4 teaspoon salt
- 1/2 cup coconut sugar (or brown sugar)
- 1/2 cup Nutella (or any hazelnut spread)
- 1/4 cup melted coconut oil (or unsalted butter)
- 2 large eggs
- 1 teaspoon vanilla extract
- 1/2 cup chocolate chips (optional, for extra fudginess)
Instructions
- Preheat your oven to 350°F (175°C).
- In a medium-sized mixing bowl, combine almond flour, cocoa powder, baking soda, and salt. Whisk until well blended.
- In a separate large mixing bowl, mix coconut sugar with melted coconut oil until well incorporated.
- Add Nutella to the sugar and oil mixture, stirring until smooth and creamy.
- Crack in the eggs and add vanilla extract. Mix until smooth and glossy.
- Gradually fold the dry ingredients into the wet mixture in three parts, being careful not to overmix.
- If desired, fold in chocolate chips for extra fudginess.
- Line an 8×8 inch (or 9×9 inch) baking pan with parchment paper and lightly grease if desired.
- Pour the brownie batter into the prepared pan, smoothing the top evenly.
- Bake in the preheated oven for 20-25 minutes, checking at the 20-minute mark. The edges should be set, and the center slightly soft.
- Remove from the oven and let cool in the pan for about 10 minutes.
- Carefully lift the brownies out using the parchment paper and transfer to a wire rack to cool completely.
- Once cool, cut the brownies into squares (about 16).
- Optionally, dust with powdered sugar or drizzle with melted chocolate. Serve with vanilla ice cream for an extra treat.
- Store leftovers in an airtight container at room temperature for up to 3 days, in the fridge for up to a week, or freeze for up to 3 months.
Notes
- For a gluten-free option, ensure all ingredients are certified gluten-free.
- Feel free to customize with nuts or other mix-ins as desired.
- Prep Time: 15 minutes
- Cook Time: 25 minutes


Leave a Comment