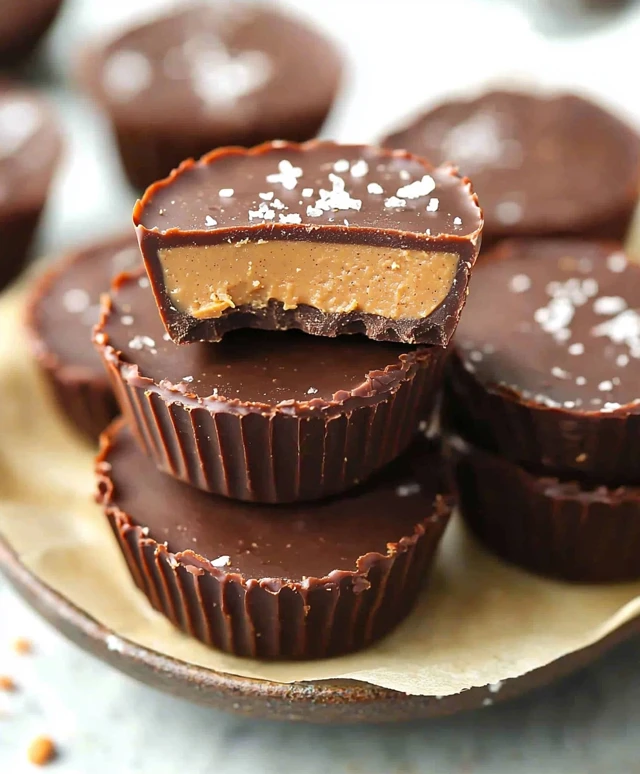
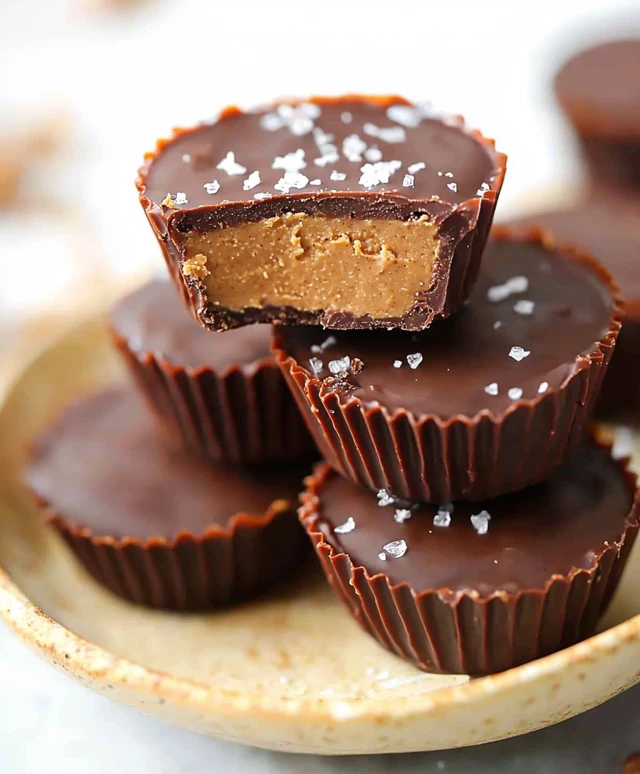
Vegan Peanut Butter Cups are a delightful treat that perfectly balances rich chocolate and creamy peanut butter, making them an irresistible indulgence for anyone with a sweet tooth. As a long-time fan of this classic candy, I was thrilled to discover a vegan version that not only satisfies my cravings but also aligns with my plant-based lifestyle. The history of peanut butter cups dates back to the 1920s, and they have since become a beloved confection across the globe. What I love most about Vegan Peanut Butter Cups is their incredible taste and texture; the smooth, nutty filling paired with a crisp chocolate shell creates a mouthwatering experience that is hard to resist. Plus, they are incredibly easy to make at home, allowing you to enjoy this delicious treat whenever the craving strikes!
Ingredients:
- 1 cup natural peanut butter (smooth or crunchy, your choice)
- 1/4 cup maple syrup or agave syrup
- 1 teaspoon vanilla extract
- 1/4 teaspoon salt
- 1 cup dairy-free chocolate chips
- 1 tablespoon coconut oil
- 1/2 cup powdered sugar (optional, for sweetness)
- Mini cupcake liners (for serving)
Preparing the Peanut Butter Filling
Lets start by making the delicious peanut butter filling that will be the star of our vegan peanut butter cups. Follow these steps:
- In a medium mixing bowl, combine the peanut butter, maple syrup (or agave syrup), vanilla extract, and salt. If you prefer a sweeter filling, you can add the powdered sugar at this stage.
- Using a spatula or a whisk, mix the ingredients together until they are well combined and smooth. You want a creamy consistency that is easy to scoop but still holds its shape.
- Taste the mixture and adjust the sweetness if necessary. If you like it sweeter, add a little more maple syrup or powdered sugar.
- Once youre satisfied with the flavor, set the bowl aside. Well come back to this filling later.
Melting the Chocolate
Now, lets move on to the chocolate coating. This is what makes our peanut butter cups so indulgent!
- In a microwave-safe bowl, combine the dairy-free chocolate chips and coconut oil. The coconut oil will help the chocolate melt smoothly and give it a nice sheen.
- Microwave the mixture in 30-second intervals, stirring in between each interval. This will help prevent the chocolate from burning. It usually takes about 1-2 minutes to melt completely.
- Once the chocolate is melted and smooth, remove it from the microwave and let it cool for a minute. We dont want it too hot when we pour it into the cupcake liners.
Assembling the Peanut Butter Cups
Now comes the fun partassembling our vegan peanut butter cups!
- Line a muffin tin with mini cupcake liners. This recipe should yield about 12 cups, so make sure you have enough liners ready.
- Using a spoon, pour a small amount of melted chocolate into the bottom of each cupcake liner. You want just enough to cover the bottom, about 1 teaspoon should do the trick.
- Gently tilt the muffin tin to ensure the chocolate coats the bottom evenly. This will create a nice base for our peanut butter filling.
- Place the muffin tin in the freezer for about 10-15 minutes, or until the chocolate is firm to the touch.
- Once the chocolate base is set, take the muffin tin out of the freezer. Now, scoop about 1 tablespoon of the peanut butter filling and place it on top of the chocolate layer in each cupcake liner. Use the back of the spoon to gently flatten the filling, making sure it doesnt touch the edges of the liner.
- After youve added the peanut butter filling to all the cups, its time to add the final layer of chocolate. Pour another teaspoon of melted chocolate over the peanut butter filling in each cup, ensuring its completely covered.
- Again, gently tilt the muffin tin to spread the chocolate evenly over the filling.
- Return the muffin tin to the freezer for another 15-20 minutes, or until the chocolate is completely set.
Storing and Serving
Once your vegan peanut butter cups are set, its time to enjoy them! Heres how to store and serve them:
- Carefully remove the peanut butter cups from the muffin tin by peeling away the cupcake liners. They should come out easily if the chocolate is set properly.
- Store the peanut butter cups in an airtight container in the refrigerator for up to two weeks. They can also be frozen for longer storagejust make sure to separate layers with parchment paper to prevent sticking.
- When youre ready to serve, you can enjoy them straight from the fridge or let them sit at room temperature for a few minutes
Conclusion:
In summary, these Vegan Peanut Butter Cups are an absolute must-try for anyone looking to indulge in a delicious treat without compromising on their dietary choices. The combination of rich, creamy peanut butter and smooth, dairy-free chocolate creates a flavor explosion that is simply irresistible. Plus, they are incredibly easy to make, requiring just a handful of ingredients and minimal prep time. For serving suggestions, I love to pair these delightful cups with a glass of almond milk or a warm cup of herbal tea for a cozy afternoon snack. You can also get creative with variationstry adding a sprinkle of sea salt on top for a sweet and salty twist, or mix in some crushed nuts or dried fruit for added texture and flavor. I encourage you to give this recipe a try and experience the joy of making your own Vegan Peanut Butter Cups at home. Once you do, Id love to hear about your experience! Share your thoughts, any variations you tried, or even a photo of your creations. Lets spread the love for these delicious treats together! PrintVegan Peanut Butter Cups: A Deliciously Healthy Treat You Can Make at Home
- Total Time: 45 minutes
- Yield: 12 mini peanut butter cups 1x
Description
Enjoy these vegan peanut butter cups with a creamy peanut butter filling and a rich dairy-free chocolate shell, perfect for a sweet treat thats plant-based and delicious!
Ingredients
- 1 cup natural peanut butter (smooth or crunchy)
- 1/4 cup maple syrup or agave syrup
- 1 teaspoon vanilla extract
- 1/4 teaspoon salt
- 1 cup dairy-free chocolate chips
- 1 tablespoon coconut oil
- 1/2 cup powdered sugar (optional, for sweetness)
- Mini cupcake liners (for serving)
Instructions
- In a medium mixing bowl, combine the peanut butter, maple syrup (or agave syrup), vanilla extract, and salt. If you prefer a sweeter filling, you can add the powdered sugar at this stage.
- Using a spatula or a whisk, mix the ingredients together until they are well combined and smooth. You want a creamy consistency that is easy to scoop but still holds its shape.
- Taste the mixture and adjust the sweetness if necessary. If you like it sweeter, add a little more maple syrup or powdered sugar.
- Once youre satisfied with the flavor, set the bowl aside.
- In a microwave-safe bowl, combine the dairy-free chocolate chips and coconut oil.
- Microwave the mixture in 30-second intervals, stirring in between each interval, until melted and smooth (about 1-2 minutes).
- Let the melted chocolate cool for a minute.
- Line a muffin tin with mini cupcake liners (this recipe yields about 12 cups).
- Pour a small amount of melted chocolate (about 1 teaspoon) into the bottom of each cupcake liner.
- Gently tilt the muffin tin to ensure the chocolate coats the bottom evenly.
- Place the muffin tin in the freezer for about 10-15 minutes, or until the chocolate is firm.
- Scoop about 1 tablespoon of the peanut butter filling and place it on top of the chocolate layer in each cupcake liner, flattening it gently.
- Pour another teaspoon of melted chocolate over the peanut butter filling in each cup, ensuring its completely covered.
- Tilt the muffin tin again to spread the chocolate evenly.
- Return the muffin tin to the freezer for another 15-20 minutes, or until the chocolate is completely set.
- Carefully remove the peanut butter cups from the muffin tin by peeling away the cupcake liners.
- Store the peanut butter cups in an airtight container in the refrigerator for up to two weeks, or freeze for longer storage (separate layers with parchment paper).
- Enjoy them straight from the fridge or let them sit at room temperature for a few minutes before serving.
Notes
- Feel free to adjust the sweetness of the peanut butter filling to your liking.
- You can use any type of dairy-free chocolate chips for this recipe.
- These peanut butter cups make a great treat for parties or as a snack!
- Prep Time: 20 minutes
- Cook Time: 5 minutes

Leave a Comment